 Oh, joy... little magnets. Lots and lots of little magnets. Yippie.
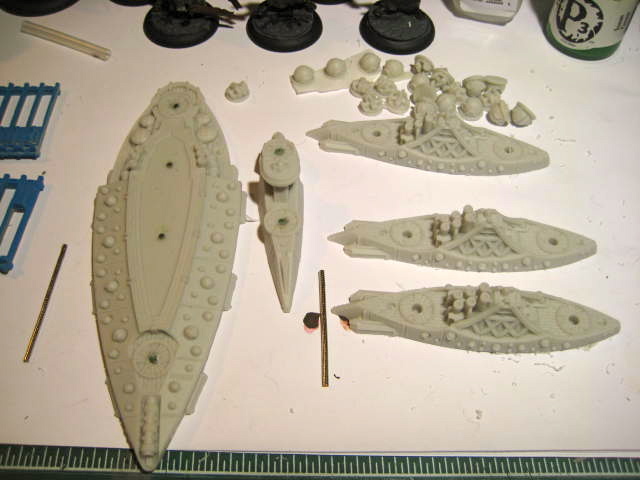
Okay, so I'm not too thrilled about working with these tiny little magnets (N52, 1/16" x 1/32") and neither are my apparently oafish fingers. Therefore it's been sort of a slow, frustrating evening at my hobby desk as I plod through magnetizing all of the turrets for my Covenant of Antarctica fleet. At this point in the project I have in place 14 magnets out of the 40 total that I will use on the battleship, the three cruisers, and the fleet carrier. This is certainly not one of my favorite hobby activities but I suppose it's worth doing this now rather than risk losing turrets every time I play. Even just them falling off the ships throughout the course of a game would quickly become annoying so avoiding that at least motivates me to keep going.
 It was not all magnetic tedium however as I also managed today to clean and prime the Pericles Class Fleet Carrier for my CoA naval group. The two-tone priming turned out better this time than on the last set of minis, but still not as well as I had done on the original test batch. Again I do not think I was conservative enough when spraying the blue primer over the initial bone-color paint, but with this color scheme it doesn't really matter as variation among models is fine and in fact desirable. I just hadn't originally intended them to be quite so blue overall, but regardless I like the results so I'm sticking with it. If I can find the time I hope to start painting the fleet carrier tomorrow.
Alright, that's all I have to report for now. I'm going to do a little bit more with the magnets before calling it quits for the night. Happy gaming and painting!
I find that using a paper clip to place the magnets is much easier than trying to do it by hand. Just put some glue in the hole and use the paper clip to stick it in. If you're working with a flat surface you can use the side of the paper clip to keep the magnet flush with the surface as a bonus. A little slip of paper can help keep the glue from sticking the magnet to the paper clip if that becomes an issue. Hope this makes the rest of your magnetizing easier.
ReplyDeleteRight on! That's a great idea and sounds like one that will save me a lot of frustration. I don't think my fingers were designed to hold onto these little magnets so using a paperclip to push them into place would be a big help. Awesome, I can't wait to try it out... good thing I still have lots of magnetizing left to do. :) Thank you very much, Chaosheade!
ReplyDeleteNice Tip Chaosheade!
ReplyDeleteJason- on thing that I did was find a drill bit with the same diameter as the magnet. The 'new' P3 drill bit kits are nice since you know the sizes and they come with several bits (not to mention brass rod for other projects). The magnet company I use (K&J) has their dimensions listed as well on their website- making life much easier.
Good luck, magnets kinda suck to put in, but are lovely once they set. In a few more years of magnet work, you'll be a pro with them!
Just a few years, huh? LOL! Well that doesn't sound too bad, maybe I'll even have my fleet finished by then.
ReplyDeleteUnfortunately what's really been slowing me down is that I couldn't find a drill bit to match the size of the magnets I'm using. It's not so bad on the ship hulls as they already have spaces into which I can fit the magnets, I just have to use some greenstuff to fill the extra room. For the turrets however I'm having to drill a guide hole then expand it with my knife, slide into place the magnet before finally adding some glue and a little extra putty to secure everything. Considering that for just five ships I have 24 turrets to magnetize, I should likely accept that this is going to be a slow process and therefore just be as patient as I can with them.
Thanks for the encouragement and suggestions, DrGabe! I hope everything is going really well for you... take care, buddy! And hey, what's going on with preparations for Adepticon and the team tournament? Has anything more been worked out yet?
You're welome, glad I could help. For me drilling and placing is the easy part. The hard part is remembering which direction to put them in haha. As for drill bits you can get 1/8" and 1/16" from any hardware store. The ones I found had the hex end for power drills but you can find screwdrivers with those types of connections too. Or you could do what I do and just drill by hand without messing with all that.
ReplyDeleteI love those models but gosh, are they big.
ReplyDelete@ Chaosheade - Haha, keeping the magnets oriented correctly is another sore spot for me. Oh well, that at least hasn't given me much trouble so far. Thanks again, Chaosheade!
ReplyDelete@ John Lambshead - They are indeed much larger than many of the more traditional naval warfare games. Perhaps that is done to differentiate them more clearly from historical wargaming. I have certainly enjoyed painting them, so I am quite happy to this point with my venturing into Dystopian Wars. Thank you, John!
Jason- funny you mentioned Adepticon. Today the emails started to fly about the team tournament. I'll make sure you get added to the conversation. About the only thing determined is that we want to play. The rest is up for debate. :)
ReplyDeleteThanks, DrGabe! Looks like we're going to have another fun time this year... it's going to be tough to choose just what games to play over the weekend. I can hardly wait!
ReplyDeleteYay! Someone else facing this problem!
ReplyDeleteThanks for the paper clip idea, Chaosheade. So simple but awesome.
Damn Convenant! Why can't we have metal turrets like other classes? :)